Document Organization
The Finder folder doesn’t just allow you to access your multimedia files—you can access your documents there as well. Document organization in the Finder folder occurs multiple ways: first off, document organization can occur through simply creating a folder. To create a folder in Finder, simply do the following:
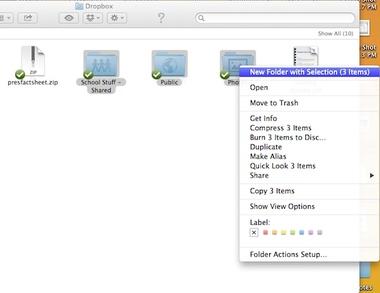
After opening Finder, select the items within the window that you would like to group together. To select multiple items, click near (not on) the file and drag to highlight all of the files you’d like to group. Then, after right clicking on one of the files, select “New Folder with Selection (# items). Rename your new folder and click return.
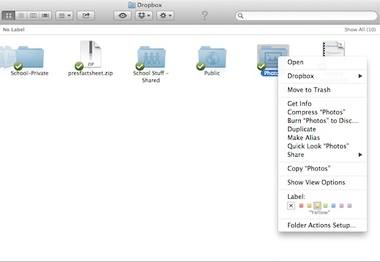
Aside from folders, another great way you can extend your ability to organize documents is by making use of labels. When you right click on a folder, you are presented with the option to add color labels on a folder. This allows you to keep your folders organized by assigning them in specific categories.
For example, you may wish to label all urgent documents with red, or business documents with yellow. How exactly do you change the settings of the labels? Simple: just go to Finder preferences. To do so, simply click on Finder in the Mac dock, and then “Preferences”. You can also use the keyboard command of Command + , (comma) to access labels—just ensure that Finder is open first. From there, under the “Labels” section, you can assign names to each color.
The Dropbox Issue
If you are a Dropbox user, you may be wondering how your files are handled in Finder. Dropbox and Finder have a wonderful, co-existing relationship on Mac: when used in conjunction with the Dropbox menu bar button, Dropbox is fully accessible, and in Finder, you are automatically given a Dropbox folder.
Available on the left sidebar, the Dropbox folder in Finder syncs periodically. When a new file is added, you will see the blue sync icon show on the file; once synchronization is complete, the blue sync icon turns into a green check. Public Dropbox folders in Finder are shown with a globe design on the folder, while shared folders will have a design featuring three people. Private ones are plain blue folders. On the Finder window, in the center, you will find a Dropbox drop-down options button that allows you to browse your folders in the web browser, share your folder’s link, and share the whole folder in general. The same options are available when you right click on the folder and move your cursor over the “Dropbox” option.
Smart Folders
So, what’s the deal with the smart folders? If you haven’t heard about them before, it’s important to get one thing straight: they aren’t technically folders, but shells of ever-updating search results of specific search criteria that you set for the folder to look up and include. For example, if you want a folder that includes just .JPEG files, Smart Folders groups these files together into your designated Smart Folder. Here’s how to get started with your customized Smart Folder:
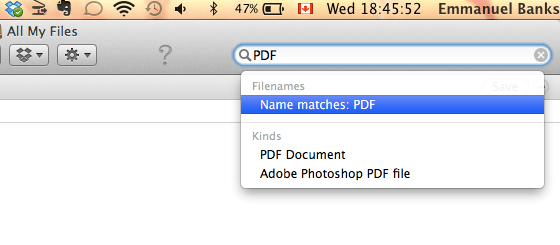
Open up Finder and search for a specific criteria for your folder in the search bar at the upper right of the window. To continue on with our document example, you could type in .PDF for all PDF files. Directly under the search bar is a “Save” button: click it! You’ll get a window popping asking you to name the file and allowing you to choose the saving location.
While this is the easiest way, it’s important to remember that this way includes anything associated with JPEG. This means if your file includes the name JPEG—even if it’s a PDF book about the history of JPEG photographs—it would be included in this folder. How do you make a more accurate Smart Folder? Here’s how:
In the top, click File, then “New Smart Folder” Add your criteria, clicking the “+” button available at the right to add more parameters. “Kind” – Allows you to choose the type of file it is. For example, an application, the file type (PDF, JPEG, etc), and the like. “Last – Date” – Allows you to include files only opened within or exactly at a certain time. You can also sort based on modification day. “Created Date” – Sort based on the day the article was added to your Mac. “Name” – Sort based on the exact name, or based on files that include that keyword. “Contains” – Type in any word, if the file is associated with it in any way, it’s included! Once done, click the “Save” button, name the folder, and choose the saving location.
Burn Folders
To finish up, we will talk a bit about how to create a burn folder. This is considered necessary when you are burning a CD onto your Mac or burning files onto a CD from your Mac. To create a burn folder, you must first go to Finder. After clicking File in the menu bar, click “New Burn Folder”, and from there, add documents and other files into that new folder. When you are ready to burn to the CD disk, open the file and click Burn. Then, insert CD, and go from there.


